
Some of my friends who saw my Popsicle Nativity on Facebook expressed interest in the pattern. I tried but I obviously don't know what I am doing. and I should be paying bills. or spending quality Family Night time with my guys. So this is what you get. Good luck. (you could search on-line)
These are the directions we were given at the Relief Society workshop. Our organizer had gotten the supplies for us and had everything in neat little baggies. She had pre-cut whatever needed cutting,
But here goes:
You need maybe 70 popsicle/craft sticks
1 or 2 tongue depressers
3 clothes pin dolls - cut so you have a small one only an inch or so?, a medium one, and a tall one
a star (you can get precut wooden stars at craft stores, as well as craft sticks and clothes pin dolls, etc)
a little raffia (or she also had some shredded grocery bag, but that was less easy to work with, I thought. and I liked the look of the raffia)
quick set Tacky Glue
hot glue gun
Set aside 10 craft sticks to finish the back.
Now, begin:
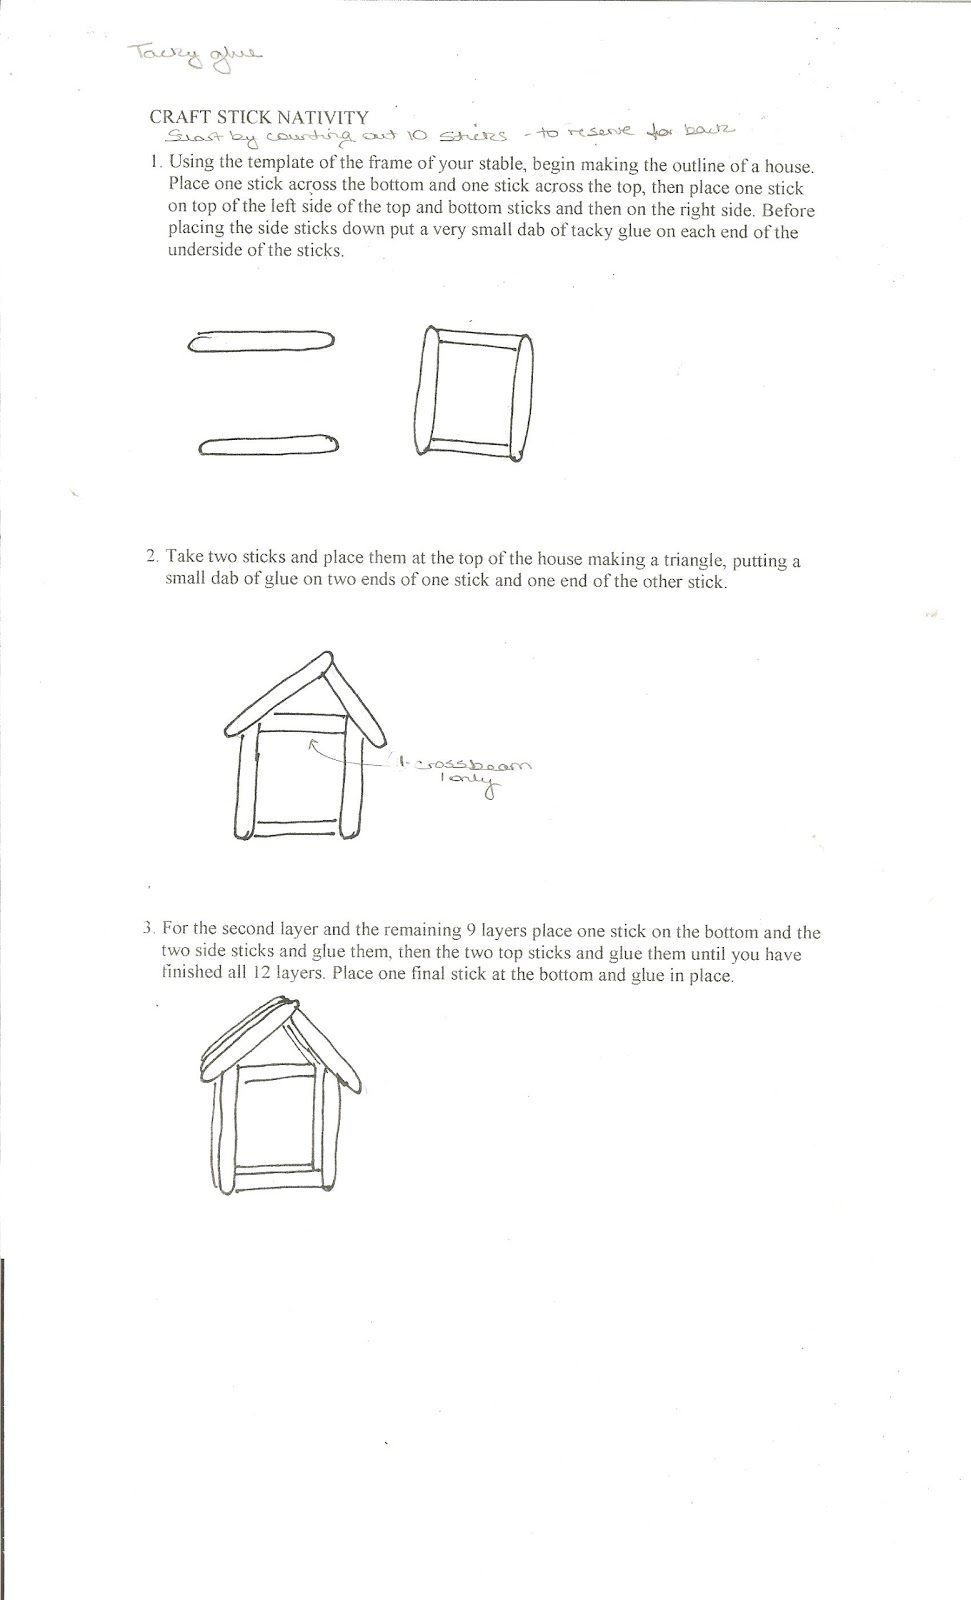
1. Using the template of the frame of your stable which is upside down in this post (sorry) or whatever will help you keep your stable square, begin making the outline of a house. Place one stick across the bottom and one stick across the top, then place one stick on the left side of the top and bottom sticks and one stick on the right side. Place them with a small dab of tacky glue.
2. Take two sticks and place them at the top of the house making a triangle - the roof.
3. For the second layer and the remaining layers, glue one stick on the bottom, the two side sticks and the two roof sticks - do not do the top cross beam again.
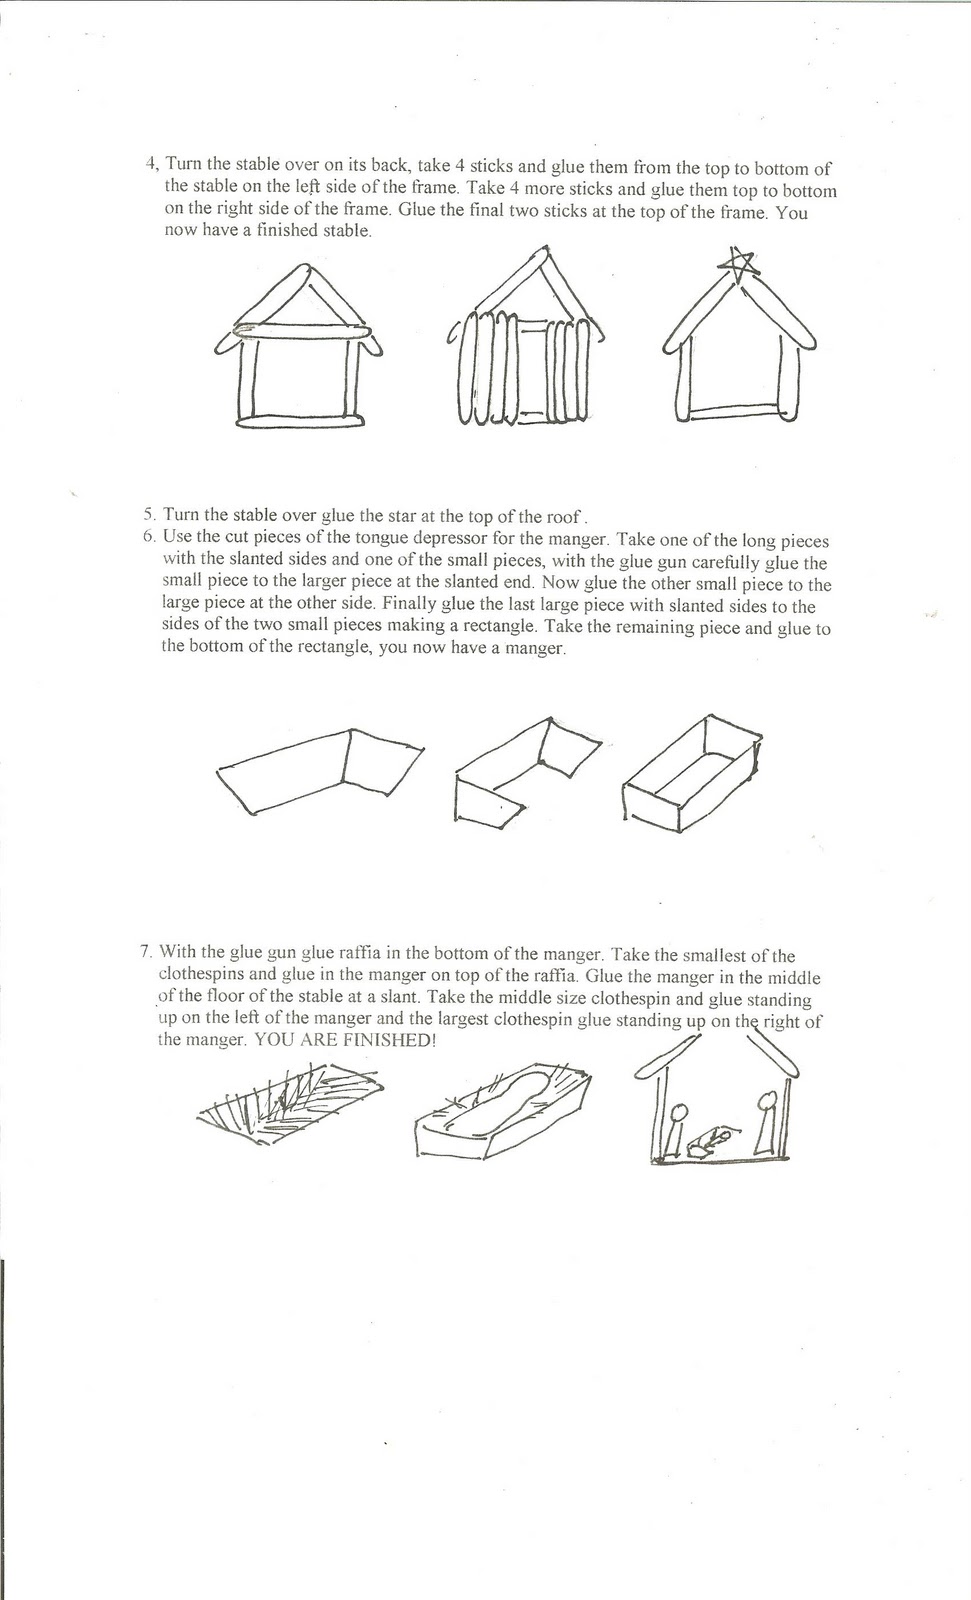
4. Turn the stable over so the back is up. Take 4 sticks & glue them from the top cross stick to the bottom on each side of the frame. Glue two final sticks at the top of the frame. (There is more space between the roof sticks at the top than at the bottom. We glued a very small square of broken stick at the top to make it more even.)
5. Turn the stable over and glue the star at the top of the roof.
6. Use cut pieces of tongue depresser t make the manger. Glue it with the hot glue gun.
Here is what directions I got say: "Take one of the long pieces with the slanted sides and one of the small pieces, with the glue gun carefully glue the small piece to the larger piece at the slanted end. Now the glue the other small piece to the large piece at the other side. Finally glue the last large piece ith slanted sides to the sides of the two small pieces making a rectangle. Take the remaining piece and glue to the bottom of the rectangle. You now have a manger."
The bottom of the manger was not as wide as the walls. You do want it to be as long. It has to connect somewhere!
7. With the glue gun, glue raffia in the bottom of the manger. Take the smallest of the clothes pins and glue it in the manger with the raffia. Glue the manger in the middle of the floor of the manger at a slant. Glue the middle size and the tall clothes pin dolls in the stable on either side of the manger.
YOU ARE FINISHED!
No comments:
Post a Comment